Ponerah- Many Bloggers are trying to create their own template as many limitations of existing templates. Especially for the original template from Blogger.com, a lot of limitations. Because it is the Master CSS attempt to make some tutorials that can improve an existing template. Or even extend the template you have.
This time I tried to give way to add a gadget or sidebar just below or above your blog posts, as you can see in the image below:

This time to make qu trying to make it easy for you guys. Notice how in the order listed below:
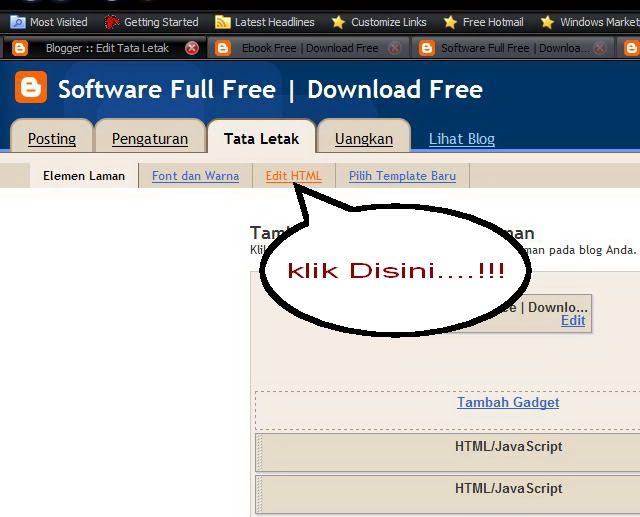
1. Open up your Dashbor Blog Layout menu and choose
2. Then click Edit HTML

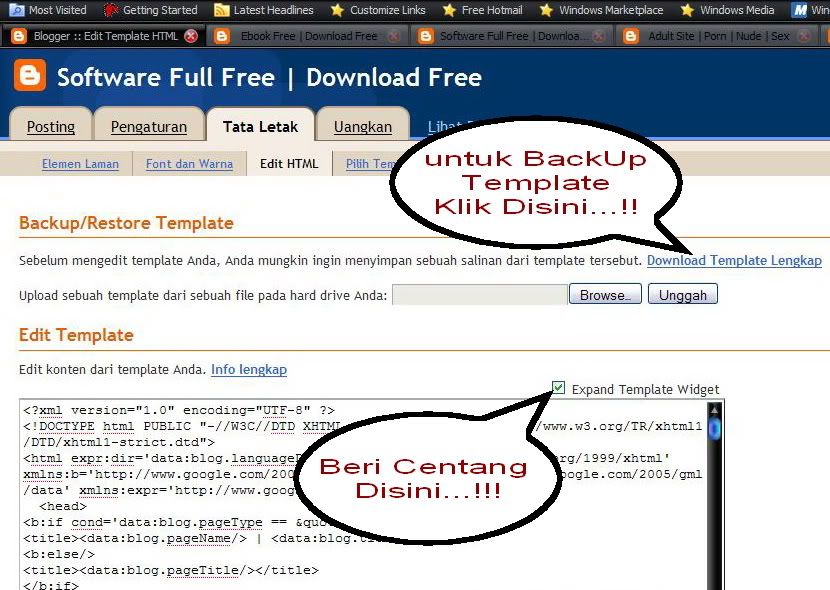
3. Try to save your template first.
4. Check the box "Expand Widget Templates"

5. Find the code below:
<div id="main-wrapper">
<b:section id="main" showaddelement="no">
6. Fox becomes like this:
<div id="main-wrapper">
<b:section id="main" showaddelement="yes">
7. Save your Template
8. If you want to position element / gadget under the posts, do the following:
* Add a gadget used to let you insert a gadget "HTML / Javascript"
* Drag the gadget to the bottom of the box Postings "Blog Post" then the position asfollows:
<div id="main-wrapper">
<b:section id="main" showaddelement="no">
6. Fox becomes like this:
<div id="main-wrapper">
<b:section id="main" showaddelement="yes">
7. Save your Template
8. If you want to position element / gadget under the posts, do the following:
* Add a gadget used to let you insert a gadget "HTML / Javascript"
* Drag the gadget to the bottom of the box Postings "Blog Post" then the position asfollows:
Read more »


0 comments:
Post a Comment